Negative painting can be tricky to learn, but it's fun too! You don't need to be an expert painter. Negative Painting can be used with many mediums such as watercolor, acrylic and oil and adapts to a variety of personal styles from highly realistic to contemporary abstraction.
Here are some basic steps for practicing on your own.
1. Lightly sketch the objects that are in the foreground (leave the back for the negative painting)
a. How much you sketch out is up to you. I generally sketch the objects that will be positively painted, and maybe a few of the objects that will be negatively painted if I am looking for a specific shape or angle.
2. Apply base color to your paper.
Stroke diluted fresh color by the brush load onto your paper. Add the colors separately allowing them to mix on the paper. Dab, drip and pour, be creative, lift and tilt the paper to encourage the pigments to flow and mingle. Leave as little or as much white as you wish.
3. Load your round brush with well diluted paint. Instead of filling in the shape with color, paint around it! Begin at the edge of your objects and pull the color out towards the outside edge of your paper, diluting with water as you go. Continue to glaze all around the shape. This is the negative space! Don't fill the shape with color. Dry your painting completely before you add more negative shapes to the area you have covered
4. Add a second shape under the first.
a. Now here's the trick of building layers in the negative. A new set of objects is added by tucking it under the first form. It will be partially hidden. Take care while adding items to ensure that they visually lines up when passing under the previous form and out the other side
5. Paint around your shapes with another color (or the same-your choice).
As the layers build increase the value a step or two darker to bring the top layers forward. Dry your painting completely between layers.
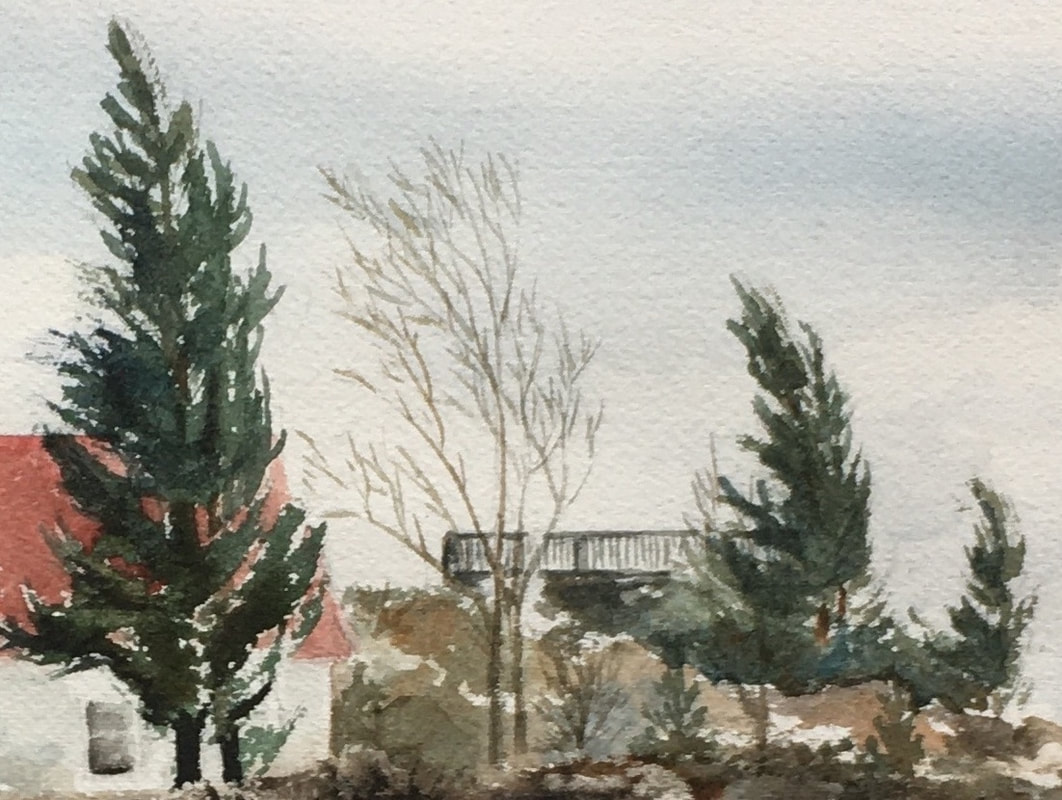
6. Continue to add layers until you have achieved the “depth” of background layers that you wanted.
7. How many layers should I have?
That depends upon what you are trying to show. Do you want for instance to show a group of trees, or a whole forest? The number of layers and the value progression to dark is what will show depth in your painting.
Here are some basic steps for practicing on your own.
1. Lightly sketch the objects that are in the foreground (leave the back for the negative painting)
a. How much you sketch out is up to you. I generally sketch the objects that will be positively painted, and maybe a few of the objects that will be negatively painted if I am looking for a specific shape or angle.
2. Apply base color to your paper.
Stroke diluted fresh color by the brush load onto your paper. Add the colors separately allowing them to mix on the paper. Dab, drip and pour, be creative, lift and tilt the paper to encourage the pigments to flow and mingle. Leave as little or as much white as you wish.
3. Load your round brush with well diluted paint. Instead of filling in the shape with color, paint around it! Begin at the edge of your objects and pull the color out towards the outside edge of your paper, diluting with water as you go. Continue to glaze all around the shape. This is the negative space! Don't fill the shape with color. Dry your painting completely before you add more negative shapes to the area you have covered
4. Add a second shape under the first.
a. Now here's the trick of building layers in the negative. A new set of objects is added by tucking it under the first form. It will be partially hidden. Take care while adding items to ensure that they visually lines up when passing under the previous form and out the other side
5. Paint around your shapes with another color (or the same-your choice).
As the layers build increase the value a step or two darker to bring the top layers forward. Dry your painting completely between layers.
6. Continue to add layers until you have achieved the “depth” of background layers that you wanted.
7. How many layers should I have?
That depends upon what you are trying to show. Do you want for instance to show a group of trees, or a whole forest? The number of layers and the value progression to dark is what will show depth in your painting.


 RSS Feed
